Virtual Environments
This lesson is adapted from Reproducible Machine Learning Workflows for Scientists by the Carpentries Incubator and rewritten to use uv.
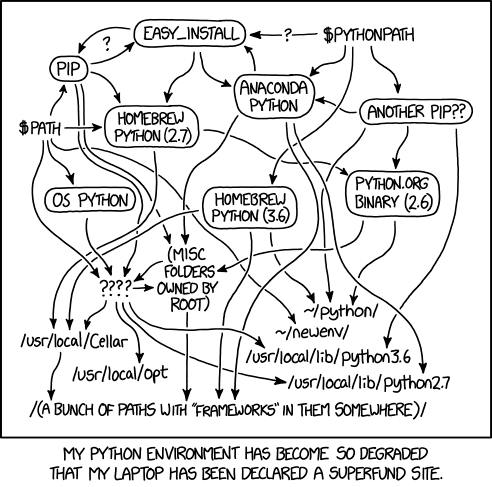
What is a virtual environment?
A virtual environment is a self-contained directory that contains a Python installation and all the packages required for a specific project. It lets us keep different projects separate, even when they need different package versions.
This separation is a key part of reproducible research. If we record exactly which Python version and packages a project uses, then other people can rebuild the same environment on their own machines.
Package managers
Python ships with venv and pip, and those tools still work. However, modern projects often need more than a manually managed virtual environment. We usually also want:
- a clear project file that records dependencies
- a lock file with exact resolved versions
- a simple way to run commands inside the project environment
- a convenient way to keep the environment reproducible
There are several tools for this job, including Conda, Mamba, Poetry, and uv. In this course we will use uv.
Why uv?

uv is a blazingly fast Python package and project manager. If you have used Conda or Poetry before, you will feel the difference. It has a few advantages that make it a good fit for this course:
- Fast: dependency resolution and installation are much faster than with older Python tooling.
- Project-local: each project gets its own
.venv, which keeps dependencies isolated. - Python-aware:
uvcan use an existing Python installation or download a managed one when needed. - Reproducible: it creates a
uv.locklock file with exact resolved package versions. - Convenient: it lets us run project commands without manually activating the environment every time.
You can read more in the official documentation.
Installing uv
If you did not install uv during setup, do that first. On macOS, Linux, and Ubuntu under WSL, run:
curl -LsSf https://astral.sh/uv/install.sh | shAfter installation, restart the terminal. You can also reload your shell manually.
Ubuntu users:
source ~/.bashrcmacOS users:
source ~/.zshrcTo verify that uv is available, run either:
uv --versionor
which uvYou should see the installed version or the path to the uv executable.
Project-based workflows
uv works well with a project-based workflow. That means the project’s dependencies, Python requirements, and virtual environment all live alongside the project files.
Pros
- Each project is isolated and does not interfere with software used by other projects.
- The project can be recreated from a small set of tracked files, especially
pyproject.tomlanduv.lock. - Editors like VS Code can easily discover the project’s
.venv.
Cons
- Each project keeps its own environment, so repeated packages may use more disk space than a fully shared setup.
- You still need to think carefully about which dependencies belong in the project.
- It only supports Python projects.
Starting a project with uv init
The word init shows up in many developer tools. You already saw it in git init. It usually means “set up the basic files needed to start here.”
With uv, init can do two related things:
- create a brand new project directory for you
- initialize a project in a directory that already exists
Let’s start by creating a new project directory:
uv init gecs-uvInitialized project `gecs-uv` at <working-directory>/gecs-uvThis creates the directory gecs-uv for you.
If you already had a project folder and wanted to initialize it in place, you could first cd into it and then run:
uv init .If you are curious about the other project templates and flags that uv supports, take a look at:
uv init --helpNow move into the new project directory and inspect its contents:
cd gecs-uv
ls -a
./
../
.git/
.gitignore
.python-version
README.md
main.py
pyproject.tomluv init also initializes a Git repository by default, so you do not need to run git init yourself afterward.
At this point there is still no .venv and no uv.lock. Those appear when uv actually has to resolve and install an environment.
uv also created a .python-version file for us. That file pins the default Python version for this project.
The project manifest
Let’s inspect the main project file:
cat pyproject.toml[project]
name = "gecs-uv"
version = "0.1.0"
description = "Add your description here"
readme = "README.md"
requires-python = ">=3.13"
dependencies = []And if you inspect .python-version:
cat .python-version3.13The most important fields here are:
[project]: metadata about the project as a wholerequires-python: which Python versions the project supportsdependencies: which Python packages belong in the project.python-version: the default Python versionuvshould use for this project
pyproject.toml uses the TOML format. The name stands for Tom’s Obvious, Minimal Language, after Tom Preston-Werner, one of the creators of the format.
TOML became popular because it is much easier for humans to read and edit than many older configuration formats. Python’s packaging ecosystem now uses it heavily, so you will keep seeing .toml files in modern projects.
Edit the description
Right now the project description is still the placeholder text. Let’s fix that.
Open the file in VS Code:
code pyproject.tomlIf the code command is not available in your terminal, you can also open pyproject.toml directly from the VS Code Explorer.
Replace the description line with something meaningful, for example:
description = "A small reproducible project managed with uv"Your pyproject.toml should now look like this:
[project]
name = "gecs-uv"
version = "0.1.0"
description = "A small reproducible project managed with uv"
readme = "README.md"
requires-python = ">=3.13"
dependencies = []
Version control from the start
Because uv init already initialized Git for us, we can start tracking changes immediately:
git status --shortYou should see the newly created files as untracked. Add them and make the first commit:
git add .
git commit -m "Initialize uv project"
This is a good habit. Instead of waiting until the very end, we will keep committing as the environment changes.
Create the environment
Now let’s ask uv to create the environment explicitly:
uv syncThis command resolves the project’s dependencies, creates the virtual environment, and makes sure the installed packages match the lock file.
Check the directory again:
ls -a./
../
.git/
.gitignore
.python-version
.venv/
README.md
main.py
pyproject.toml
uv.lockTwo important things appeared:
.venv/: this is the virtual environment itself. It contains the Python executable, installed package files, and all the other moving parts that make the environment run. This is the meat of the environment.uv.lock: this is the lock file. It is like taking a snapshot of your environment’s package versions at this moment in time.
When someone else clones your repository and runs uv sync, uv uses that snapshot to rebuild the environment as closely as possible.
Let’s also confirm that the starter program runs:
uv run main.pyHello from gecs-uv!Since uv.lock is now part of the project state, commit that change too:
git add uv.lock
git commit -m "lock initial environment"
Activate the environment
Sometimes it is still convenient to activate the environment directly, for example if you want to run several commands in a row without prefixing each one with uv run.
First make sure the environment is up to date:
uv syncThen activate it:
source .venv/bin/activateYour shell prompt will usually change and show something like (.venv) at the beginning. You can now run project tools directly:
pythonTo leave the environment, run:
deactivateAdd packages
Before we move on to marimo, let’s install the packages we want available in this project:
uv add numpy matplotlibuv updates both pyproject.toml and uv.lock, then installs the packages into .venv.
Commit those dependency changes:
git add pyproject.toml uv.lock
git commit -m "add plotting dependencies"
To view the installed dependency tree, use:
uv treeThis is often more helpful than a flat package list because it shows which packages depend on which other packages.
If you want to inspect the dependency graph in a platform-independent way, use:
uv tree --universalThis is another reproducibility tool: one project manifest, one lock file, and one dependency graph that uv can recreate consistently across machines.
uv records a universal lock file and supports platform-specific dependencies through standard Python environment markers.
For example, if you needed a package only on Windows, you could write:
uv add "pywin32; sys_platform == 'win32'"If that changed your project’s dependency set, you would again commit the updated pyproject.toml and uv.lock.
marimo
For data analysis, Jupyter notebooks have been the default for a long time. In this course, we will use marimo instead.
For this course, marimo has a few advantages:
- it is reactive, so dependent cells stay in sync
- it avoids a lot of hidden state problems that make notebooks hard to reproduce
- marimo notebooks are stored as plain
.pyfiles, which makes them much friendlier to Git
That last point is especially important: you can use Git to track changes in a marimo notebook just like any other Python file.
Let’s add marimo to the project:
uv add marimoand check the dependency tree again:
uv treeFinally, commit the changes to the project:
git add pyproject.toml uv.lock
git commit -m "add marimo"
Running commands without activation
One of the nicest parts of uv is that you usually do not need to activate the environment manually. Instead, run commands through uv run.
First, activate the environment
source .venv/bin/activateNow, we can explore marimo’s built-in plotting tutorial:
marimo tutorial plotsThis will open a browser window with the tutorial. To run the tutorial, press Play button in the bottom right corner or press Ctrl/Cmd+ Shift + R to run all cells.
Once you are done, you can exit the tutorial and deactivate the environment by presing Red cross button (Shutdown) in the top-right corner of the browser page or Ctrl/Cmd + C in the terminal.
Global tools
uv can also install command-line tools into isolated environments and expose them on your PATH.
For example, to install bat, a nicer version of cat, run:
uv tool install batIf this is the first tool you install, uv may suggest adding its tool directory to your PATH. If needed, follow that suggestion with:
uv tool update-shellTo list globally installed tools:
uv tool listTo remove the tool again:
uv tool uninstall batThese tools are isolated from your project environments, which keeps your system utilities separate from your project dependencies.
Sandbox with uvx
Sometimes you do not want to create or grow a full project environment. You might just want to try a tool quickly in an isolated sandbox.
That is what uvx is for. It runs a command from a package in a temporary environment without adding that package to your project’s dependencies.
Let’s introduce another tool by Astral called Ruff. Ruff is a fast Python linter that can help you find and fix code issues. Linter are special tools that analyze your code for potential errors, style violations, and other issues. If you want to lint the current project with Ruff without installing Ruff into the project environment. You can run:
uvx ruff check .If you want an extra-isolated throwaway environment that does not interact with already installed packages, you can also use:
uvx --isolated ruff check .Less serious but more fun.
uvx pycowsay helloor try some classic games from freegames pacakage:
uvx freegames play snakeThis command will download the freegames package, run the snake game, and then remove the package again when you exit the game.
For the list of available games, run:
uvx freegames listor check the freegames documentation.
This is handy when you just want to explore a tool, run a one-off check, or try something quickly without making your project environment bigger.
Once you are done playing, to deactivate the lessson’s environment, run:
deactivateThe book project
Throughout this lesson, we built a uv project from scratch. If you’d like to see a complete example project, you can access it on GitHub at https://github.com/igorsdub/gecs-venv.
To use this example project on your machine:
cd ~
git clone https://github.com/igorsdub/gecs-venv.git
cd gecs-venv
Then follow the instructions in the README.md file to set up the project.
Your turn
Now it’s your turn! Create a new project with uv init, add some dependencies, and run a small Python program. Make sure to commit your changes as you go.
Then publish your project to GitHub and share the link with your classmates and see if they can recreate your environment with uv sync.
Let them to modify your code and create pull requests. You can then review their changes and merge them into your project.
Pull the changes from your classmates, run uv sync to update your environment with their changes, and see if everything still works as expected.
Recap
In this lesson, you:
- installed
uv - used
uv initto start a project - edited
pyproject.toml - created
.venvanduv.lockwithuv sync - learned that
uv.lockis a snapshot of package versions - added
marimo,numpy, andmatplotlib - ran the marimo plotting tutorial
- committed the project in small steps as it evolved
That is already enough to build a small, reproducible Python project that others can recreate on their own machines.